




m Removed empty portal template using script |
Kartikeyar (talk | contribs) enhanced layout and updated info |
||
| Line 1: | Line 1: | ||
{{Short description|1942 battle of World War II}} | {{Short description|1942 battle of World War II}} | ||
{{Use British English|date= | {{Use British English|date=August 2025}} | ||
{{Infobox military conflict | {{Infobox military conflict | ||
|conflict=Battle of Alam el Halfa | | conflict = Battle of Alam el Halfa | ||
|partof=the [[Western Desert | | partof = the [[Western Desert campaign]] of the [[Second World War]] | ||
|image= File:Karte - Schlacht bei Alam Halfa (1942).png | | image = File:Karte - Schlacht bei Alam Halfa (1942).png | ||
| | | image_upright = 1.0 | ||
|caption= Map of the battlefield (in German) | | caption = Map of the battlefield (in German) | ||
|date=30 August – 5 September 1942 | | date = 30 August – 5 September 1942 | ||
|place= Near [[El Alamein]], [[Egypt]] | | place = Near [[El Alamein]], [[Egypt]] | ||
|coordinates = {{coord|30|40|N|29|10|E|type:event|display=inline}} | | coordinates = {{coord|30|40|N|29|10|E|type:event|display=inline}} | ||
|casus= | | casus = | ||
|territory= | | territory = | ||
|result= British victory | | result = British victory | ||
|combatant1={{flag|United Kingdom}} | | combatant1 = {{ubl|{{flag|United Kingdom}}|{{flagcountry|Dominion of New Zealand}}}} | ||
|combatant2={{ | | combatant2 = {{ubl|{{flag|Nazi Germany|name=Germany}}|{{flag|Kingdom of Italy|name=Italy}}}} | ||
|commander1={{ | | commander1 = {{ubl|[[Bernard Montgomery]]|[[Brian Horrocks]]}} | ||
|commander2={{ | | commander2 = {{ubl|[[Erwin Rommel]]|[[Fritz Bayerlein]]|[[Giuseppe De Stefanis]]|[[Federico Ferrari Orsi]]}} | ||
| | | strength1 = 4 Divisions | ||
|strength2= | | strength2 = 6 Divisions | ||
|casualties1=1,750 killed, wounded or captured | | casualties1 = {{ubl|1,750 killed, wounded or captured|68 tanks|67 aircraft{{sfn|Watson|2007|p=14}}{{sfn|Buffetaut|1995|pp=90–91}}}} | ||
|casualties2=2,900 killed, wounded or captured | | casualties2 = {{ubl|2,900 killed, wounded or captured|49 tanks|36 aircraft|60 guns|400 transport vehicles{{sfn|Watson|2007|p=14}}}} | ||
|campaignbox = {{Campaignbox Western Desert}} | | campaignbox = {{Campaignbox Western Desert}} | ||
}} | }} | ||
The '''Battle of Alam el Halfa''' took place between 30 August and 5 September 1942 south of [[El Alamein]] during the [[Western Desert Campaign]] of the [[Second World War]]. | The '''Battle of Alam el Halfa''' took place between 30 August and 5 September 1942 south of [[El Alamein]] during the [[Western Desert Campaign]] of the [[Second World War]]. {{lang|de|[[Panzerarmee Afrika]]}} ({{lang|de|[[Generalfeldmarschall]]}} [[Erwin Rommel]]), attempted an envelopment of the British [[Eighth Army (United Kingdom)|Eighth Army]] ([[Lieutenant-general (United Kingdom)|Lieutenant-General]] [[Bernard Montgomery]]). In {{lang|de|Unternehmen Brandung}} (Operation Surf), the last big [[Axis powers|Axis]] offensive of the Western Desert Campaign, Rommel intended to defeat the Eighth Army before [[Allies of World War II|Allied]] reinforcements arrived. | ||
Montgomery knew of Axis intentions through [[Ultra (cryptography)|Ultra]] signals intercepts and left a gap in the southern sector of the front, knowing that Rommel planned to attack there | Montgomery knew of Axis intentions through [[Ultra (cryptography)|Ultra]] signals intercepts and left a gap in the southern sector of the front, knowing that Rommel planned to attack there. The bulk of the British armour and artillery was dug in around Alam el Halfa Ridge, {{cvt|20|mi}} behind the front. Unlike in previous engagements, Montgomery ordered that the tanks were to be used as anti-tank guns, remaining in their defensive positions on the ridge. When the Axis attacks on the ridge failed and short on supplies, Rommel ordered a withdrawal. The [[2nd New Zealand Division]] conducted Operation Beresford against Italian positions, which was a costly failure. | ||
Montgomery did not exploit his defensive victory, preferring to continue the methodical build up of strength for his autumn offensive, the [[Second Battle of El Alamein]]. Rommel claimed that British air superiority determined the result, being unaware of Ultra. Rommel adapted to the increasing Allied dominance in the air by keeping his forces dispersed. With the failure at Alam Halfa, the Axis forces in Africa lost the initiative and Axis strategic aims in Africa were no longer | Montgomery did not exploit his defensive victory, preferring to continue the methodical build up of strength for his autumn offensive, the [[Second Battle of El Alamein]]. Rommel claimed that British air superiority determined the result, being unaware of Ultra. Rommel adapted to the increasing Allied dominance in the air by keeping his forces dispersed. With the failure at Alam Halfa, the Axis forces in Africa lost the initiative and Axis strategic aims in Africa were no longer achievable. | ||
==Background== | ==Background== | ||
A lull followed the Axis failure in the [[First Battle of El Alamein]] and the [[counterattack]]s by the Eighth Army ([[General (United Kingdom)|General]] [[ | A lull followed the Axis failure in the [[First Battle of El Alamein]] and the [[counterattack]]s by the Eighth Army ([[General (United Kingdom)|General]] Sir [[Claude Auchinleck]]) in July 1942. At Alamein, the Axis supply position was precarious because the main supply ports of [[Port of Benghazi|Benghazi]] and [[Tobruk]] were {{cvt|800|mi|abbr=on}} and {{cvt|400|mi|abbr=on}} from the front and Tripoli, {{cvt|1200|mi|abbr=on}} away, was almost redundant because of its distance from the front.{{sfn|Playfair|2004|p=379}} The original Axis plan for the [[Battle of Gazala]] in June had been to capture Tobruk then pause for six weeks on the [[Egypt]]ian frontier to prepare an invasion of Egypt. The magnitude of the Axis victory at Gazala led Rommel to pursue the Eighth Army to deny the Allies time to organise another defensive front west of Cairo and the [[Suez Canal]]. Axis air forces which had been allocated to [[Operation Herkules]], an attack on [[Malta]], were diverted into Egypt.{{sfn|Hinsley|1981|pp=418–419}} | ||
The British in Malta were able to rebuild their strength | The British in Malta were able to rebuild their strength and resume attacks on Axis supply convoys to North Africa. From mid-August there was a big increase in Axis losses at sea, notably from a reinforced Mediterranean submarine force.{{sfn|Hinsley|1981|pp=418–419}} At the end of August, the Axis had been reinforced by troops flown from Crete but were short of supplies, notably ammunition and petrol.{{sfn|Playfair|2004|pp=338, 379, 392}} There was a recovery in the armoured strength of {{lang|de|Panzerarmee Afrika}} in August, German tank strength rising from 133 "runners" to 234 and the number of Italian runners increased from 96 to 281 (of which 234 were medium tanks). ''[[Luftwaffe]]'' strength increased to 298 aircraft from 210 before the Battle of Gazala and the Italian number rising to 460 aircraft.{{sfn|Hinsley|1981|p=412}} | ||
General [[Harold Alexander, 1st Earl Alexander of Tunis|Sir Harold Alexander]] | General [[Harold Alexander, 1st Earl Alexander of Tunis|Sir Harold Alexander]], the new [[Commander-in-Chief]] (C-in-C) of [[Middle East Command]], had only a short distance from the supply bases and ports in Egypt to the front line but supplies from Britain, the Commonwealth and the United States still took a long time to arrive. By the summer of 1942, equipment receipts began to increase, notably of new [[M4 Sherman|Sherman tanks]] and [[Ordnance QF 6 pounder|six-pounder]] anti-tank guns, to supplement the obsolete [[Ordnance QF 2-pounder|2-pounders]]. The [[Desert Air Force]], supported by new American squadrons, maintained a considerable degree of air superiority.{{sfn|Playfair|2004|p=392}} Sources of military intelligence were integrated and by mid-August, British and Allied forces were benefiting from tactically useful information.{{sfn|Hinsley|1981|pp=410–411}} | ||
German intelligence had warned Rommel of the arrival of a {{ | German intelligence had warned Rommel of the arrival of a {{cvt|100000|LT|lk=on|abbr=on}} Allied convoy bringing new vehicles for the Allies in Egypt; reinforcements for the British would tilt the balance of advantage against the Axis.{{sfn|Carver|2000|p=48}}{{sfn|Fraser|1993|p=351}} Rommel demanded from the Italian {{lang|it|[[Comando Supremo]]}} in Rome {{cvt|6000|ST|abbr=on}} of fuel and {{cvt|2500|ST|abbr=on}} of ammunition before attacking at the end of the month but by 29 August, over 50 per cent of the supply ships from Italy had been sunk and only {{cvt|1500|ST|abbr=on}} of fuel had arrived at Tobruk. Rommel had to gamble on a quick victory before the increasing power of the Eighth Army made defeat inevitable. After [[Albert Kesselring]] had agreed to lend some ''Luftwaffe'' fuel, Rommel had enough for {{cvt|150|mi|abbr=on}} per vehicle with the troops and {{cvt|250|mi|abbr=on}} for other vehicles.{{sfn|Playfair|2004|p=382}} | ||
==Prelude== | ==Prelude== | ||
| Line 42: | Line 42: | ||
===Plan=== | ===Plan=== | ||
[[File:Italian column moving towards Alam el Halfa.jpg|thumb|left|{{centre|Italian XX Motorised Corps (XX {{lang|it|Corpo d'Armata}}, Generale Giuseppe de Stefanis)}}]] | [[File:Italian column moving towards Alam el Halfa.jpg|thumb|left|{{centre|Italian XX Motorised Corps (XX {{lang|it|Corpo d'Armata}}, Generale Giuseppe de Stefanis)}}]] | ||
At El Alamein an attack by the Axis would have to pass between the coast and the [[Qattara Depression]] about {{cvt|40|mi | At El Alamein an attack by the Axis would have to pass between the coast and the [[Qattara Depression]] about {{cvt|40|mi}} to the south and impassable for tanks. The Eighth Army defences were quite strong but Rommel believed that the south end between Munassib and Qaret El Himeimat, was lightly held and not extensively mined.{{sfn|Watson|2007|p=12}} One account indicated the northern and central sectors of the front were so strongly fortified that the southern stretch of {{cvt|15|mi|abbr=on}} between the New Zealand "box" on the Alam Nayil Ridge and the Qattara Depression, was the only place where an attack could quickly succeed. Since surprise in location was impossible, Rommel had to depend on achieving surprise by time and speed. By rapidly breaking through in the south, Axis forces might get astride the Eighth Army supply routes, throw it off balance and disorganise its defence.{{sfn|Fraser|1993|pp=355–357}} | ||
Rommel planned a night attack to be well beyond the Eighth Army minefields before sunrise. In the north, the | Rommel planned a night attack to be well beyond the Eighth Army minefields before sunrise. In the north, the Italian {{lang|it|[[:it:XXI Corpo d'armata (Regio Esercito)|XXI Corpo d'Armata]]}} ({{lang|it|Generale}} [[Enea Navarini]]) comprising the [[102nd Motorized Division "Trento"|102nd Motorised Division "Trento"]] and [[25th Infantry Division "Bologna"]], the XXXI {{lang|it|Guastatori}} (Sappers) Battalion, the German 164th Light Division and elements of the Ramcke Parachute Brigade, was to conduct a frontal demonstration to fix the defenders. The main attack was to be led by the [[15th Panzer Division (Wehrmacht)|15th ''Panzer'' Division]] and the [[21st Panzer Division (Wehrmacht)|21st ''Panzer'' Division]] and the [[90th Light Infantry Division (Wehrmacht)|90th Light Division]] to the south which would turn north once through the British minefields.{{sfn|Fraser|1993|pp=355–357}} The Eighth Army would be surrounded and destroyed, leaving the Axis forces with a promenade through Egypt to the Suez Canal.{{sfn|Carver|2000|p=49}}{{sfn|Stumpf|2001|p=755}} | ||
===Allied defences=== | ===Allied defences=== | ||
[[File:Alamein1st1942 07.svg|thumb|Alam el Halfa battlefield, August 1942]] | [[File:Alamein1st1942 07.svg|thumb|Alam el Halfa battlefield, August 1942]] | ||
British [[Ultra (cryptography)|Ultra decrypts]] | British [[Ultra (cryptography)|Ultra decrypts]] uncovered the Axis plan and Auchinleck set out the defence scheme with several contingencies for defensive works around Alexandria and Cairo in case Axis armour broke through.{{sfn|Harper|2017|p=93}}{{sfn|Smith|2002|pp=74–77}}{{efn|"Only a few days before the battle, Ultra confirmed that Montgomery's estimate of Rommel's intentions was correct."{{sfn|Smith|2002|pp=74–77}}}} On 13 August, command of the [[Eighth Army (United Kingdom)|Eighth Army]] passed to [[Lieutenant-general (United Kingdom)|Lieutenant-General]] [[Bernard Montgomery]]. After visiting the front, Montgomery ordered that the contingency plans be destroyed and emphasised his intention to hold the ground around Alamein at all costs.{{sfn|Watson|2007|p=10}} In the northern sector, just south of Ruweisat Ridge to the coast, [[XXX Corps (United Kingdom)|XXX Corps]] (Lieutenant-General [[William Havelock Ramsden|William Ramsden]]) comprising the [[9th Australian Division]], the [[1st South African Infantry Division]] and the [[5th Indian Infantry Division]] with the [[23rd Armoured Brigade]] in reserve was deployed behind minefields.{{sfn|Playfair|2004|p=384}}{{sfn|Fraser|1993|p=354}} | ||
[[XIII Corps (United Kingdom)|XIII Corps]] (Lieutenant-General [[Brian Horrocks]]) held the ground south of Ruweisat Ridge. The [[2nd New Zealand Division]] was deployed on a {{ | [[XIII Corps (United Kingdom)|XIII Corps]] (Lieutenant-General [[Brian Horrocks]]) held the ground south of Ruweisat Ridge. The [[2nd New Zealand Division]] was deployed on a {{cvt|5|mi|abbr=on}} front south of the ridge in the New Zealand Box, which formed a corner to the main defences with its hinge of the higher ground at Alam Nayil. Since the featureless southern sector was hard to defend against an armoured attack, Montgomery chose to hold lightly the {{cvt|12|mi|abbr=on}} front from the New Zealand Box to Qaret el Himeimat on the edge of the Qattara Depression, to encourage Rommel to take the bait and attack there. This gap would be mined and wired; the [[18th Infantry Brigade (United Kingdom)|7th Motor Brigade Group]] and [[4th Infantry Brigade and Headquarters North East|4th Light Armoured Brigade]] ([[7th Armoured Division (United Kingdom)|7th Armoured Division]]) would cover the minefields but withdraw when necessary.{{sfn|Fraser|1993|pp=354–355}} | ||
The attackers would meet the main defensive positions when they swung north and approached the Alam el Halfa ridge, behind the Eighth Army front. The bulk of the British medium tanks | The attackers would meet the main defensive positions when they swung north and approached the Alam el Halfa ridge, behind the Eighth Army front. The bulk of the British medium tanks in the [[22nd Armoured Brigade]] and anti-tank units were dug in to wait for the Axis attack. Behind the British armour, on the high ground to the north east would be two infantry brigades of the [[44th (Home Counties) Division]] with divisional and corps artillery.{{sfn|Walker|1967|p=45}} The [[10th Armoured Division (United Kingdom)|10th Armoured Division]] had been refitting in the Nile Delta with [[M3 Lee|Grant tanks]] with the effective {{cvt|75|mm}} main gun and would reinforce the Alam El Halfa position when available. Most of the [[8th Armoured Brigade (United Kingdom)|8th Armoured Brigade]] had arrived by 30 August and took post to manoeuvre on the left of 22nd Armoured Brigade and on the flank of the expected advance of the Axis.{{sfn|Playfair|2004|p=384}} Once Montgomery had seen the Axis dispositions after the initial advance, he released the 23rd Armoured Brigade, in XXX Corps reserve at the eastern end of Ruweisat Ridge, to XIII Corps, attached to the 10th Armoured Division. By 13:00 on 31 August, 100 [[Valentine tank]]s had moved to fill the gap between the 22nd Armoured Brigade and the New Zealanders.{{sfn|Playfair|2004|p=387}} | ||
==Battle== | ==Battle== | ||
| Line 61: | Line 61: | ||
{{Further|Battle of Alam el Halfa order of battle}} | {{Further|Battle of Alam el Halfa order of battle}} | ||
The attack started on the night of 30 August, taking advantage of a full moon. From the start, things went wrong for Rommel; the | The attack started on the night of 30 August, taking advantage of a full moon. From the start, things went wrong for Rommel; the DAF spotted the Axis vehicle concentrations and unleashed several air attacks on them. [[Fairey Albacore]]s of the [[Fleet Air Arm]] dropped flares to illuminate targets for [[Vickers Wellington|Wellington]] [[medium bomber]]s and for the artillery; the minefields that were thought to be thin turned out to be deep.{{sfn|Watson|2007|p=13}} The British units covering the minefields were the two brigades of the 7th Armoured Division (7th Motor and 4th Armoured), whose orders were to inflict maximum casualties before retiring. This they did and the Axis losses began to rise. They included General [[Walther Nehring]], the ''Afrika Korps'' commander, wounded in an air raid and General [[Georg von Bismarck]], commander of the 21st Panzer Division, killed by a mine explosion.{{sfn|Playfair|2004|p=386}} | ||
===31 August=== | ===31 August=== | ||
Despite these difficulties, Rommel's forces were through the minefields by midday the next day and had wheeled left and were drawn up ready to make the main attack originally scheduled for 06:00. | Despite these difficulties, Rommel's forces were through the minefields by midday the next day and had wheeled left and were drawn up ready to make the main attack originally scheduled for 06:00.{{sfn|Playfair|2004|p=386}} Being behind schedule and harassment by flank attacks from the 7th Armoured Division had forced them to turn north into Montgomery's flank further west than originally planned and directly toward the defences on Alam el Halfa. At 13:00, the 15th Panzer Division set off, followed an hour later by the 21st Panzer Division. The British units holding the ridge were the 22nd Armoured Brigade with 92 Grants and 74 light tanks, supported by anti-tank units with six-pounder guns and the artillery of the 44th (Home Counties) Division and the 2nd New Zealand Division.{{sfn|Carver|2000|p=58}} | ||
The Axis forces had approximately 200 gun-armed tanks in the two ''Panzer'' divisions and | The Axis forces had approximately 200 gun-armed tanks in the two ''Panzer'' divisions and 243 in the two Italian armoured divisions. The Italian tanks were mostly worn out and obsolete models, except for the [[Semovente da 75/18]], which could defeat Allied medium tanks using HEAT ammunition, which could penetrate 70 mm of armour at {{cvt|50|m}}. The Germans had 93 ''Panzer'' IIIs and 73 Panzer III (specials) with long-barrelled {{cvt|50|mm|abbr=on}} guns (Pz.Kpfw III Ausf.L) and 10 ''Panzer'' IV and 27 Panzer IV (specials) with long 75 mm guns (Pz.Kpfw IV Ausf.F2).{{sfn|Playfair|2004|p=383}} The British had 700 tanks at the front, of which 160 were Grants. Only 500 of the British tanks were engaged in the armoured battle, which was brief.{{sfn|Liddell Hart|1973|pp=293–295}} | ||
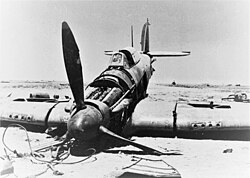
[[File:Destroyed British plane.jpg|thumb|A | [[File:Destroyed British plane.jpg|thumb|A Hurricane fighter brought down by Italian anti-aircraft fire during the battle.]] | ||
As the ''Panzer'' divisions approached the ridge, the [[Panzer IV|''Panzer'' IV F2]] tanks opened fire at long range and destroyed several British tanks. The British [[M3 Lee#British Commonwealth service names and variants|Grants]] were handicapped by their hull-mounted guns that prevented them from firing from hull-down positions. When the Germans came into range, they were exposed to the fire of the brigade and their tanks were hard hit. An attempt to outflank the British was thwarted by anti-tank guns and with night beginning to fall and fuel running short because of the delays and heavy consumption over the bad 'going', General [[Gustav von Vaerst]], the ''Afrika Korps'' commander, ordered the ''Panzers'' to pull back. During this engagement, the Germans lost 22 tanks and the British 21. | As the ''Panzer'' divisions approached the ridge, the [[Panzer IV|''Panzer'' IV F2]] tanks opened fire at long range and destroyed several British tanks. The British [[M3 Lee#British Commonwealth service names and variants|Grants]] were handicapped by their hull-mounted guns that prevented them from firing from hull-down positions. When the Germans came into range, they were exposed to the fire of the brigade and their tanks were hard hit. An attempt to outflank the British was thwarted by anti-tank guns and with night beginning to fall and fuel running short because of the delays and heavy consumption over the bad 'going', General [[Gustav von Vaerst]], the ''Afrika Korps'' commander, ordered the ''Panzers'' to pull back. During this engagement, the Germans lost 22 tanks and the British 21.{{sfn|Carver|2000|p=62}} In the central sector, the 25th Infantry Division "Bologna" and German Infantry Regiment 433 attacked several Indian, South African and New Zealand units on Ruweisat Ridge and managed to capture Point 211 but were later driven off by a counter-attack.{{sfn|Playfair|2004|pp=385–386}}{{efn|The ''[[Official History of New Zealand in the Second World War 1939–45]]'' refers to the Italo-German infantry action as 'feints'.{{sfn|Murphy|1966|p=358}} Captain [[Cyril Falls]], a British military historian, wrote that it was a strong counter-attack requiring an equal response."In the centre of the British front a good Italian division, the Bologna, delivered a strong attack on the Ruweisat Ridge, and a considerable counter-attack was required to expel it from the footing it gained."{{sfn|Falls|1948|p=262}}}} | ||
===1–2 September=== | ===1–2 September=== | ||
The night of 31 August | The night of 31 August/1 September brought no respite for the Axis forces, as the Albacore and Wellington bomber combinations returned to the attack, concentrating on the Axis supply lines. This added to Rommel's supply difficulties as Allied action had sunk over 50 per cent of the {{cvt|5000|LT|abbr=on}} of petrol promised to him by Mussolini.{{sfn|Lightbody|2004|p=142}} On 1 September the 21st Panzer Division was inactive (probably because of a lack of fuel) and operations were limited to an attack by the 15th Panzer Division toward the eastern flank of the 22nd Armoured Brigade.{{sfn|Playfair|2004|p=387}} The attack started at dawn but was quickly stopped by a flank attack from the 8th Armoured Brigade. The Germans suffered little, as the British were under orders to spare their tanks for the coming offensive but they could make no headway either and were severely shelled.{{sfn|Fraser|1993|p=359}} The [[132nd Armoured Division "Ariete"]] and [[133rd Armored Division "Littorio"|133rd Armoured Division "Littorio"]] had moved up on the left of the ''Afrika Korps'' and the 90th Light Division and elements of Italian X Corps had drawn up to face the southern flank of the New Zealand box.{{sfn|Playfair|2004|p=387}} Air raids continued throughout the day and night and on the morning of 2 September, realising his offensive had failed and that staying in the salient would only add to his losses, Rommel decided to withdraw.{{sfn|Carver|2000|p=67}} | ||
====Axis withdrawal==== | ====Axis withdrawal==== | ||
[[File:Martin A-30A.jpg|thumb|RAF [[Martin Baltimore|Baltimore]] day bomber]] | [[File:Martin A-30A.jpg|thumb|RAF [[Martin Baltimore|Baltimore]] day bomber]] | ||
In a message to {{lang|de|[[Oberkommando der Wehrmacht]]}} (OKW) | In a message to {{lang|de|[[Oberkommando der Wehrmacht]]}} (OKW armed forces high command) Rommel justified his decision to abandon the offensive by the lack of fuel, Allied air superiority and the loss of surprise.{{sfn|Playfair|2004|p=388}} On 2 September, [[Armored car (military)|Armoured cars]] of the 4/[[8th Hussars]] (4th Armoured Brigade) attacked 300 Axis supply lorries near Himeimat, destroying 57 and Italian armoured units had to be moved to protect Axis supply lines. In the air the DAF flew 167 bomber and 501 fighter sorties.{{sfn|Carver|2000|p=67}} Montgomery realised that the ''Afrika Korps'' was about to withdraw and planned attacks by the 7th Armoured Division and the 2nd New Zealand Division (Lieutenant-General [[Bernard Freyberg]]) under the proviso that they were to avoid excessive losses. The 7th Armoured Division managed harassment raids but the New Zealand Division attacked with the experienced 5th New Zealand Brigade, the new [[132nd Infantry Brigade (United Kingdom)|132nd Infantry Brigade]] (Brigadier C. B. Robertson) of the 44th (Home Counties) Division under command and tank support from the [[46th (Liverpool Welsh) Royal Tank Regiment|46th Royal Tank regiment]] (46th RTR, 23rd Army Tank Brigade).{{sfn|Barr|2005|pp=245–246}} | ||
=== | ===Operation Beresford=== | ||
[[File:Valentine tank Mk3 desert.jpg|thumb|left|A British Valentine tank in North Africa.]] | [[File:Valentine tank Mk3 desert.jpg|thumb|left|A British Valentine tank in North Africa.]] | ||
Operation Beresford began at 22:30 on 3 | Operation Beresford began at 22:30 on 3 September. The 5th New Zealand Brigade on the left inflicted many casualties on the Italian defenders and defeated Axis counter-attacks the next morning.{{sfn|Barr|2005|pp=245–246}} The Axis defenders were alerted by diversionary raids by the 6th New Zealand Brigade (Brigadier [[George Herbert Clifton|George Clifton]]) on the right flank of the 132nd Infantry Brigade which was an hour late arriving on their start line. The attack was a costly failure; the Valentine tanks of the 46th RTR got lost in the dark and ran onto a minefield where twelve were knocked out. The 90th Light Division inflicted 697 casualties on the 132nd Infantry Brigade and 275 casualties on the New Zealanders.{{sfn|Carver|2000|p=70}} Robertson was wounded and Clifton was captured by a patrol of the X Battalion of the Italian [[185th Infantry Division "Folgore"]]. The vigorous Axis defence suggested to Freyberg that another attack was unlikely to succeed and advised that the troops should be withdrawn from their very exposed positions and the operation called off. Montgomery and Horrocks agreed and the troops were withdrawn on the night of 4 September.{{sfn|Playfair|2004|p=389}} | ||
{{ | |||
===5 September=== | ===5 September=== | ||
The position north of the New Zealand Division was held by 5th Indian Infantry Division, relieved by the [[ | The position north of the New Zealand Division was held by 5th Indian Infantry Division, relieved by the [[4th Indian Infantry Division]] on 9 September. After this failure against the ''Folgore'' Division, the ''Afrika Korps'' retired unhindered, except for attacks by the DAF, which flew 957 sorties in 24 hours.{{sfn|Buffetaut|1995|p=90}} By 5 September, the Axis units were back almost on their starting positions and the battle was over.{{sfn|Liddell Hart|1973|p=295}} | ||
==Aftermath== | ==Aftermath== | ||
[[File:A British soldier inspects the grave of a German tank crewman, killed when his PzKpfw III tank was knocked out in the Western Desert, 29 September 1942. E17549.jpg|thumb|A British soldier inspects the grave of a German tank crewman, killed when his | ===Analysis=== | ||
[[File:A British soldier inspects the grave of a German tank crewman, killed when his PzKpfw III tank was knocked out in the Western Desert, 29 September 1942. E17549.jpg|thumb|A British soldier inspects the grave of a German tank crewman, killed when his Panzer III tank was knocked out in the battle, 29 September 1942.]] | |||
The battle was the last big offensive undertaken by the Axis in North Africa and the superior firepower of the Allies and their air supremacy brought them victory.{{sfn|Watson|2007|p=14}} There has been criticism of Montgomery's leadership during the battle, especially his decision to avoid losses, which prevented the British tank formations from trying to finish off the ''Afrika Korps'' when it was strung out between the minefields and Alam Halfa.{{sfn|Carver|2000|p=181}} [[Friedrich von Mellenthin]] in ''[[Panzerschlachten|Panzer Battles]]'' painted a dramatic picture of ''Panzer'' divisions, paralysed by lack of fuel, under constant bombardment and awaiting a British onslaught.{{sfn|Mellenthin|1956|p=103}} | |||
Montgomery pointed out that the Eighth Army was in a process of reformation with the arrival of new, untrained units and was not ready to take the offensive. Nor was his army yet prepared for a {{ | Montgomery pointed out that the Eighth Army was in a process of reformation with the arrival of new, untrained units and was not ready to take the offensive. Nor was his army yet prepared for a {{cvt|1600|mi|abbr=on}} pursuit were they to break through, which had caused both sides to fail to end the desert campaign, after gaining tactical success. Montgomery did not want his tanks wasted on futile attacks against Rommel's anti-tank screen, something that had frequently happened in the past, handing the initiative to the Axis forces. Rommel complained to Kesselring, "The swine isn't attacking!"{{sfn|Walker|1967|p=180}} Montgomery kept his forces intact and the Eighth Army accumulated supplies for the offensive in October that came to be known as the [[Second Battle of El Alamein]].{{sfn|Fraser|1993|p=360}} | ||
===Casualties=== | |||
During the Battle of Alam el Halfa, the Allies suffered 1,750 casualties, compared to 2,930 for the Axis. The Allies lost more tanks than the Axis but for the first time in this campaign there was no great disproportion in tank losses. Constant harassment by the RAF cost the ''Panzerarmee Afrika'' many transport vehicles.{{sfn|Watson|2007|p=14}} | |||
==See also== | ==See also== | ||
* [[List of British military equipment of World War II]] | * [[List of British military equipment of World War II]] | ||
* [[List of German military equipment of World War II]] | * [[List of German military equipment of World War II]] | ||
* [[List of Italian Army equipment in World War II]] | * [[List of Italian Army equipment in World War II]] | ||
* [[North African campaign timeline]] | * [[North African campaign timeline]] | ||
* [[List of World War II Battles]] | * [[List of World War II Battles]] | ||
| Line 118: | Line 114: | ||
{{Refbegin}} | {{Refbegin}} | ||
* {{cite book |last=Barr |first=N. |title=Pendulum of War: The Three Battles of Alamein |year=2005 |location=Woodstock |publisher=Overlook Press |isbn=1-58567-655-1}} | * {{cite book |last=Barr |first=N. |title=Pendulum of War: The Three Battles of Alamein |year=2005 |location=Woodstock |publisher=Overlook Press |isbn=1-58567-655-1}} | ||
* {{cite book |ref={{harvid|Stumpf|2001}}|last1=Boog |first1=H. |last2=Rahn |first2=R. |last3=Stumpf |first3=R. |last4=Wegner |first4=B. |translator-last1=Osers |translator-first1=E. |translator-last2=Brownjohn |translator-first2=J. |translator3-last=Crampton |translator3-first=P. |translator4-last=Willmot |translator4-first=L. |editor-last=Osers |editor-first=E. |series=Germany and the Second World War |title=The Global War: Widening of the Conflict into a World War and the Shift of the Initiative 1941–1943 (Edited by the Militărgeschichtliches Forschungsamt [Research Institute for Military History] Potsdam, Germany) |volume=VI |year=2001 |chapter=(Part V) The War in the Mediterranean Area 1942–1943: Operations in North Africa and the Central Mediterranean. 2. The Battle of Alam Halfa (30 August–6 September 1942) |pages=748–764 |publisher=Clarendon Press |location=Oxford |language=en |isbn=0-19-822888-0}} | |||
* {{cite book |ref={{harvid|Stumpf|2001}} | |||
|last1=Boog |first1=H. |last2=Rahn |first2=R. |last3=Stumpf |first3=R. |last4=Wegner |first4=B. |translator-last1=Osers |translator-first1=E. |translator-last2=Brownjohn |translator-first2=J. |translator3-last=Crampton |translator3-first=P. |translator4-last=Willmot |translator4-first=L. |editor-last=Osers |editor-first=E. |series=Germany and the Second World War |title=The Global War: Widening of the Conflict into a World War and the Shift of the Initiative 1941–1943 (Edited by the Militărgeschichtliches Forschungsamt [Research Institute for Military History] Potsdam, Germany) |volume=VI |year=2001 |chapter=(Part V) The War in the Mediterranean Area 1942–1943: Operations in North Africa and the Central Mediterranean. 2. The Battle of Alam Halfa (30 August–6 September 1942) |pages=748–764 |publisher=Clarendon Press |location=Oxford |language=en |isbn=0-19-822888-0}} | |||
* {{cite book |last=Buffetaut |first=Yves |year=1995 |series=Les grandes batailles de la Seconde Guerre mondiale, Collection hors-série Militaria |number=16 |title=Operation Supercharge-La seconde bataille d'El Alamein |trans-title=Operation Supercharge: The Second Battle of El Alamein |publisher=Histoire Et Collections |location=Paris |language=fr |oclc=464158829}} | * {{cite book |last=Buffetaut |first=Yves |year=1995 |series=Les grandes batailles de la Seconde Guerre mondiale, Collection hors-série Militaria |number=16 |title=Operation Supercharge-La seconde bataille d'El Alamein |trans-title=Operation Supercharge: The Second Battle of El Alamein |publisher=Histoire Et Collections |location=Paris |language=fr |oclc=464158829}} | ||
* {{cite book |last=Carver |first=Michael |author-link=Michael Carver, Baron Carver |year=2000 |orig-year=1962 |title=El Alamein |publisher=Wordsworth Editions |location=Stansted |isbn=1-84022-220-4}} | |||
* {{cite book |last=Carver |first=Michael |author-link=Michael Carver, Baron Carver |year=1962 |title=El Alamein |publisher=Wordsworth Editions |isbn=1-84022-220-4 | |||
* {{cite book |title=Knight's Cross: A Life of Field Marshal Erwin Rommel |last=Fraser |first=David |year=1993 |publisher=Harper Collins |location=London |isbn=0-00-638384-X}} | * {{cite book |title=Knight's Cross: A Life of Field Marshal Erwin Rommel |last=Fraser |first=David |year=1993 |publisher=Harper Collins |location=London |isbn=0-00-638384-X}} | ||
* {{cite journal |last=Falls |first=Cyril |title=Aftermath of War: The Eights Army from Alamein to Sangro |journal=The Illustrated London News |volume=212 |issue=5672–5684 |publisher=The Illustrated London News & Sketch |year=1948 |issn=0019-2422}} | * {{cite journal |last=Falls |first=Cyril |title=Aftermath of War: The Eights Army from Alamein to Sangro |journal=The Illustrated London News |volume=212 |issue=5672–5684 |publisher=The Illustrated London News & Sketch |year=1948 |issn=0019-2422}} | ||
* {{cite book |last1=Hinsley |first1=F. H. |last2=Thomas |first2=E. E. |last3=Ransom |first3=C. F. G. |last4=Knight |first4=R. C. |author-link1=Harry Hinsley |title=British Intelligence in the Second World War. Its influence on Strategy and Operations |volume=II |location=London |publisher=[[HMSO]] |year=1981 |isbn=0-11-630934-2}} | * {{cite book |last1=Harper |first1=Glyn |title=The battle for North Africa: El Alamein and the turning point for World War II |date=2017 |publisher=Indiana University Press |location=Bloomington, Indiana |isbn=978-0-253-03143-3}} | ||
* {{cite book |ref={{harvid|Hinsley|1981}}|last1=Hinsley |first1=F. H. |last2=Thomas |first2=E. E. |last3=Ransom |first3=C. F. G. |last4=Knight |first4=R. C. |author-link1=Harry Hinsley |title=British Intelligence in the Second World War. Its influence on Strategy and Operations |volume=II |location=London |publisher=[[HMSO]] |year=1981 |isbn=0-11-630934-2}} | |||
* {{cite book |last=Liddell Hart |first=Basil |title=Liddell Hart's History of the Second World War |year=1973 |orig-year=1970 |publisher=Cassell |edition=repr. Book Club Associates |isbn=978-0-33-358262-6}} | |||
* {{cite book |first=Bradley |last=Lightbody |title=The Second World War: Ambitions to Nemesis |year=2004 |publisher=Routledge |location=London |isbn=0-415-22404-7}} | * {{cite book |first=Bradley |last=Lightbody |title=The Second World War: Ambitions to Nemesis |year=2004 |publisher=Routledge |location=London |isbn=0-415-22404-7}} | ||
* {{cite book |last=Mellenthin |first=Friedrich Wilhem von |translator-last=Turner |translator-first=L. C. F. |title=Panzer Battles: A Study of the Employment of Armour in the Second World War |year=1956 |publisher=Ballantine |location=New York |oclc=638823584}} | * {{cite book |last=Mellenthin |first=Friedrich Wilhem von |translator-last=Turner |translator-first=L. C. F. |title=Panzer Battles: A Study of the Employment of Armour in the Second World War |year=1956 |publisher=Ballantine |location=New York |oclc=638823584}} | ||
* {{cite book |first=W. E. |last=Murphy |series=Official History of New Zealand in the Second World War 1939–1945 |title=2nd New Zealand Divisional Artillery |publisher=War History Branch |location=Wellington |year=1966 |orig-year=1966 |oclc=226971027}} | * {{cite book |first=W. E. |last=Murphy |series=Official History of New Zealand in the Second World War 1939–1945 |title=2nd New Zealand Divisional Artillery |publisher=War History Branch |location=Wellington |year=1966 |orig-year=1966 |oclc=226971027}} | ||
* {{cite book | | * {{cite book |ref={{harvid|Playfair|2004}} |first1=Ian |last1=Playfair |author1-link=Ian Stanley Ord Playfair |first2=F. C. |last2=with Flynn |first3=C. J. C. |last3=Molony |first4=T. P. |last4=Gleave |editor-last=Butler |editor-first=J. R. M. |editor-link=James Ramsay Montagu Butler |series=History of the Second World War United Kingdom Military Series |title=The Mediterranean and Middle East: British Fortunes reach their Lowest Ebb (September 1941 to September 1942) |volume=III |publisher=HMSO |edition=facs. repr. Naval & Military Press, Uckfield |year=2004 |orig-year=1960 |isbn=1-84574-067-X |name-list-style=amp}} | ||
* {{cite journal |last1=Smith |first1=Kevin D. |title=Coming into its Own: The contribution of Intelligence at the Battle of Alam Halfa |journal=[[Military Review]] |year=2002 |url=https://apps.dtic.mil/sti/tr/pdf/ADA513129.pdf |pages=74–77 |issn=0026-4148 |archive-date=2025-02-02 |access-date=2025-08-09 |archive-url=https://web.archive.org/web/20250202023131/https://apps.dtic.mil/sti/tr/pdf/ADA513129.pdf |url-status=live}} | |||
* {{cite | * {{cite book |chapter-url=https://nzetc.victoria.ac.nz/tm/scholarly/tei-WH2Alam-c11.html |series=The Official History of New Zealand in the Second World War 1939–1945 |last=Walker |first=Ronald |year=1967 |title=Alam Halfa and Alamein |chapter=Chapter 11, Summary of the Battle |publisher=New Zealand Historical Publications Branch, Wellington |pages=165–181 |oclc=893102}} | ||
* {{cite book |chapter-url= | * {{cite book |first=Bruce Allen |last=Watson |title=Exit Rommel |publisher=Stackpole |location=Mechanicsburg PA |year=2007 |orig-year=1999 |isbn=978-0-8117-3381-6}} | ||
* {{cite book |first=Bruce Allen |last=Watson |title=Exit Rommel |publisher=Stackpole |location=Mechanicsburg PA |year=2007 |isbn=978-0-8117-3381-6 | |||
{{Refend}} | {{Refend}} | ||
==Further reading== | ==Further reading== | ||
* {{cite book |last1=Beretta |first1=Davide |title=Batterie semoventi, alzo zero: quelli di El Alamein |trans-title=Self-propelled Batteries, Point Blank of El Alamein |date=1997 |publisher=Mursia |location=Milano |isbn=88-425-2179-5}} | |||
* {{cite book |last1=Cappellano |first1=Filippo |title=Italian Medium Tanks: 1939–45 |year=2012 |publisher=Osprey |location=Oxford |isbn=978-1-84908-775-9}} | |||
* {{cite web |first1=Carl |last1=Conetta |last2=Knight |first2=Charles |last3=Unterseher |first3=Lutz |title=Defensive Military Structures in Action: Historical Examples |date=September 1997 |url=http://www.comw.org/pda/webbtl.htm |work=Confidence-Building Defense: A Comprehensive Approach to Security & Stability in the New Era, Study Group on Alternative Security Policy and Project on Defense Alternatives |publisher=Commonwealth Institute |location=Cambridge, Massachusetts |others=1994 |oclc=45377322 |access-date=2007-01-11 |archive-date=2008-03-11 |archive-url=https://web.archive.org/web/20080311190607/http://www.comw.org/pda/webbtl.htm |url-status=dead }} | |||
* {{cite book |last1=Cox |first1=Sebastian |last2=Gray |first2=Peter |year=2002 |title=Air Power History: Turning Points from Kitty Hawk to Kosovo |publisher=Frank Cass |location=London |isbn=0-7146-8257-8}} | |||
* {{cite book |last=Montanari |first=Mario |translator-last=Doré |translator-first=Dominique |title=The Three Battles of El Alamein (June–November 1942 Parte Prima |year=2007 |publisher=L'Ufficio Storico dello Stato Maggiore dell'Esercito |location=Roma |url=https://issuu.com/rivista.militare1/docs/africa-occidentale-vol-iii-alamein-english-parte-1 |access-date=11 December 2019 |edition=online scan abbr. trans, Le operazioni in Africa Settentrionale vol III |via=issuu |isbn=978-88-87940-79-4}} | * {{cite book |last=Montanari |first=Mario |translator-last=Doré |translator-first=Dominique |title=The Three Battles of El Alamein (June–November 1942 Parte Prima |year=2007 |publisher=L'Ufficio Storico dello Stato Maggiore dell'Esercito |location=Roma |url=https://issuu.com/rivista.militare1/docs/africa-occidentale-vol-iii-alamein-english-parte-1 |access-date=11 December 2019 |edition=online scan abbr. trans, Le operazioni in Africa Settentrionale vol III |via=issuu |isbn=978-88-87940-79-4}} | ||
* {{cite book |first=Shimon |last=Naveh |title=In Pursuit of Military Excellence; The Evolution of Operational Theory |publisher=Frank Cass |location=London |year=1997 |orig-year=1991 |isbn=0-7146-4727-6}} | |||
* {{cite web |title=U.S. Combat Studies Institute Battle Report: Alam Halfa |first1=Major-General G. P. B. |last1=Roberts |author-link=George Philip Bradley Roberts |last2=Bayerlein |first2=Generalleutnant Fritz |author-link2=Fritz Bayerlein |editor=Basil Liddell Hart |editor-link=Basil Liddell Hart |access-date=5 November 2007 |url=http://www-cgsc.army.mil/carl/resources/csi/hart/hart.asp |archive-url=https://web.archive.org/web/20071021084922/http://www-cgsc.army.mil/carl/resources/csi/hart/hart.asp |archive-date=21 October 2007 |url-status=dead }} | |||
==External links== | ==External links== | ||
{{Commons category|Battle of Alam el Halfa}} | {{Commons category|Battle of Alam el Halfa}} | ||
* [https://www.bbc.co.uk/history/ww2peopleswar/timeline/factfiles/nonflash/a1125073.shtml?sectionId=4&articleId=1125073 | * [https://www.bbc.co.uk/history/ww2peopleswar/timeline/factfiles/nonflash/a1125073.shtml?sectionId=4&articleId=1125073 Battle of Alam Halfa ''WW2 People's War'' BBC] | ||
{{World War II}} | {{World War II}} | ||
| Line 159: | Line 157: | ||
[[Category:Battles of World War II involving Italy]] | [[Category:Battles of World War II involving Italy]] | ||
[[Category:Battles of World War II involving Germany]] | [[Category:Battles of World War II involving Germany]] | ||
[[Category:August 1942 | [[Category:Tank battles of World War II]] | ||
[[Category:September 1942 | [[Category:Tank battles involving Germany]] | ||
[[Category:Tank battles involving the United Kingdom]] | |||
[[Category:August 1942 in Africa]] | |||
[[Category:September 1942 in Africa]] | |||
Latest revision as of 02:32, 25 August 2025
| Battle of Alam el Halfa | |||||||
|---|---|---|---|---|---|---|---|
| Part of the Western Desert campaign of the Second World War | |||||||
.png) Map of the battlefield (in German) | |||||||
| |||||||
| Belligerents | |||||||
| Commanders and leaders | |||||||
| Strength | |||||||
| 4 Divisions | 6 Divisions | ||||||
| Casualties and losses | |||||||
| |||||||


The Battle of Alam el Halfa took place between 30 August and 5 September 1942 south of El Alamein during the Western Desert Campaign of the Second World War. Panzerarmee Afrika (Generalfeldmarschall Erwin Rommel), attempted an envelopment of the British Eighth Army (Lieutenant-General Bernard Montgomery). In Unternehmen Brandung (Operation Surf), the last big Axis offensive of the Western Desert Campaign, Rommel intended to defeat the Eighth Army before Allied reinforcements arrived.
Montgomery knew of Axis intentions through Ultra signals intercepts and left a gap in the southern sector of the front, knowing that Rommel planned to attack there. The bulk of the British armour and artillery was dug in around Alam el Halfa Ridge, 20 mi (32 km) behind the front. Unlike in previous engagements, Montgomery ordered that the tanks were to be used as anti-tank guns, remaining in their defensive positions on the ridge. When the Axis attacks on the ridge failed and short on supplies, Rommel ordered a withdrawal. The 2nd New Zealand Division conducted Operation Beresford against Italian positions, which was a costly failure.
Montgomery did not exploit his defensive victory, preferring to continue the methodical build up of strength for his autumn offensive, the Second Battle of El Alamein. Rommel claimed that British air superiority determined the result, being unaware of Ultra. Rommel adapted to the increasing Allied dominance in the air by keeping his forces dispersed. With the failure at Alam Halfa, the Axis forces in Africa lost the initiative and Axis strategic aims in Africa were no longer achievable.
Background[edit | edit source]
A lull followed the Axis failure in the First Battle of El Alamein and the counterattacks by the Eighth Army (General Sir Claude Auchinleck) in July 1942. At Alamein, the Axis supply position was precarious because the main supply ports of Benghazi and Tobruk were 800 mi (1,300 km) and 400 mi (640 km) from the front and Tripoli, 1,200 mi (1,900 km) away, was almost redundant because of its distance from the front.[3] The original Axis plan for the Battle of Gazala in June had been to capture Tobruk then pause for six weeks on the Egyptian frontier to prepare an invasion of Egypt. The magnitude of the Axis victory at Gazala led Rommel to pursue the Eighth Army to deny the Allies time to organise another defensive front west of Cairo and the Suez Canal. Axis air forces which had been allocated to Operation Herkules, an attack on Malta, were diverted into Egypt.[4]
The British in Malta were able to rebuild their strength and resume attacks on Axis supply convoys to North Africa. From mid-August there was a big increase in Axis losses at sea, notably from a reinforced Mediterranean submarine force.[4] At the end of August, the Axis had been reinforced by troops flown from Crete but were short of supplies, notably ammunition and petrol.[5] There was a recovery in the armoured strength of Panzerarmee Afrika in August, German tank strength rising from 133 "runners" to 234 and the number of Italian runners increased from 96 to 281 (of which 234 were medium tanks). Luftwaffe strength increased to 298 aircraft from 210 before the Battle of Gazala and the Italian number rising to 460 aircraft.[6]
General Sir Harold Alexander, the new Commander-in-Chief (C-in-C) of Middle East Command, had only a short distance from the supply bases and ports in Egypt to the front line but supplies from Britain, the Commonwealth and the United States still took a long time to arrive. By the summer of 1942, equipment receipts began to increase, notably of new Sherman tanks and six-pounder anti-tank guns, to supplement the obsolete 2-pounders. The Desert Air Force, supported by new American squadrons, maintained a considerable degree of air superiority.[7] Sources of military intelligence were integrated and by mid-August, British and Allied forces were benefiting from tactically useful information.[8]
German intelligence had warned Rommel of the arrival of a 100,000 long tons (100,000 t) Allied convoy bringing new vehicles for the Allies in Egypt; reinforcements for the British would tilt the balance of advantage against the Axis.[9][10] Rommel demanded from the Italian Comando Supremo in Rome 6,000 short tons (5,400 t) of fuel and 2,500 short tons (2,300 t) of ammunition before attacking at the end of the month but by 29 August, over 50 per cent of the supply ships from Italy had been sunk and only 1,500 short tons (1,400 t) of fuel had arrived at Tobruk. Rommel had to gamble on a quick victory before the increasing power of the Eighth Army made defeat inevitable. After Albert Kesselring had agreed to lend some Luftwaffe fuel, Rommel had enough for 150 mi (240 km) per vehicle with the troops and 250 mi (400 km) for other vehicles.[11]
Prelude[edit | edit source]
Plan[edit | edit source]

At El Alamein an attack by the Axis would have to pass between the coast and the Qattara Depression about 40 mi (64 km) to the south and impassable for tanks. The Eighth Army defences were quite strong but Rommel believed that the south end between Munassib and Qaret El Himeimat, was lightly held and not extensively mined.[12] One account indicated the northern and central sectors of the front were so strongly fortified that the southern stretch of 15 mi (24 km) between the New Zealand "box" on the Alam Nayil Ridge and the Qattara Depression, was the only place where an attack could quickly succeed. Since surprise in location was impossible, Rommel had to depend on achieving surprise by time and speed. By rapidly breaking through in the south, Axis forces might get astride the Eighth Army supply routes, throw it off balance and disorganise its defence.[13]
Rommel planned a night attack to be well beyond the Eighth Army minefields before sunrise. In the north, the Italian XXI Corpo d'Armata (Generale Enea Navarini) comprising the 102nd Motorised Division "Trento" and 25th Infantry Division "Bologna", the XXXI Guastatori (Sappers) Battalion, the German 164th Light Division and elements of the Ramcke Parachute Brigade, was to conduct a frontal demonstration to fix the defenders. The main attack was to be led by the 15th Panzer Division and the 21st Panzer Division and the 90th Light Division to the south which would turn north once through the British minefields.[13] The Eighth Army would be surrounded and destroyed, leaving the Axis forces with a promenade through Egypt to the Suez Canal.[14][15]
Allied defences[edit | edit source]

British Ultra decrypts uncovered the Axis plan and Auchinleck set out the defence scheme with several contingencies for defensive works around Alexandria and Cairo in case Axis armour broke through.[16][17][lower-alpha 1] On 13 August, command of the Eighth Army passed to Lieutenant-General Bernard Montgomery. After visiting the front, Montgomery ordered that the contingency plans be destroyed and emphasised his intention to hold the ground around Alamein at all costs.[18] In the northern sector, just south of Ruweisat Ridge to the coast, XXX Corps (Lieutenant-General William Ramsden) comprising the 9th Australian Division, the 1st South African Infantry Division and the 5th Indian Infantry Division with the 23rd Armoured Brigade in reserve was deployed behind minefields.[19][20]
XIII Corps (Lieutenant-General Brian Horrocks) held the ground south of Ruweisat Ridge. The 2nd New Zealand Division was deployed on a 5 mi (8.0 km) front south of the ridge in the New Zealand Box, which formed a corner to the main defences with its hinge of the higher ground at Alam Nayil. Since the featureless southern sector was hard to defend against an armoured attack, Montgomery chose to hold lightly the 12 mi (19 km) front from the New Zealand Box to Qaret el Himeimat on the edge of the Qattara Depression, to encourage Rommel to take the bait and attack there. This gap would be mined and wired; the 7th Motor Brigade Group and 4th Light Armoured Brigade (7th Armoured Division) would cover the minefields but withdraw when necessary.[21]
The attackers would meet the main defensive positions when they swung north and approached the Alam el Halfa ridge, behind the Eighth Army front. The bulk of the British medium tanks in the 22nd Armoured Brigade and anti-tank units were dug in to wait for the Axis attack. Behind the British armour, on the high ground to the north east would be two infantry brigades of the 44th (Home Counties) Division with divisional and corps artillery.[22] The 10th Armoured Division had been refitting in the Nile Delta with Grant tanks with the effective 75 mm (3.0 in) main gun and would reinforce the Alam El Halfa position when available. Most of the 8th Armoured Brigade had arrived by 30 August and took post to manoeuvre on the left of 22nd Armoured Brigade and on the flank of the expected advance of the Axis.[19] Once Montgomery had seen the Axis dispositions after the initial advance, he released the 23rd Armoured Brigade, in XXX Corps reserve at the eastern end of Ruweisat Ridge, to XIII Corps, attached to the 10th Armoured Division. By 13:00 on 31 August, 100 Valentine tanks had moved to fill the gap between the 22nd Armoured Brigade and the New Zealanders.[23]
Battle[edit | edit source]
30/31 August[edit | edit source]
The attack started on the night of 30 August, taking advantage of a full moon. From the start, things went wrong for Rommel; the DAF spotted the Axis vehicle concentrations and unleashed several air attacks on them. Fairey Albacores of the Fleet Air Arm dropped flares to illuminate targets for Wellington medium bombers and for the artillery; the minefields that were thought to be thin turned out to be deep.[24] The British units covering the minefields were the two brigades of the 7th Armoured Division (7th Motor and 4th Armoured), whose orders were to inflict maximum casualties before retiring. This they did and the Axis losses began to rise. They included General Walther Nehring, the Afrika Korps commander, wounded in an air raid and General Georg von Bismarck, commander of the 21st Panzer Division, killed by a mine explosion.[25]
31 August[edit | edit source]
Despite these difficulties, Rommel's forces were through the minefields by midday the next day and had wheeled left and were drawn up ready to make the main attack originally scheduled for 06:00.[25] Being behind schedule and harassment by flank attacks from the 7th Armoured Division had forced them to turn north into Montgomery's flank further west than originally planned and directly toward the defences on Alam el Halfa. At 13:00, the 15th Panzer Division set off, followed an hour later by the 21st Panzer Division. The British units holding the ridge were the 22nd Armoured Brigade with 92 Grants and 74 light tanks, supported by anti-tank units with six-pounder guns and the artillery of the 44th (Home Counties) Division and the 2nd New Zealand Division.[26]
The Axis forces had approximately 200 gun-armed tanks in the two Panzer divisions and 243 in the two Italian armoured divisions. The Italian tanks were mostly worn out and obsolete models, except for the Semovente da 75/18, which could defeat Allied medium tanks using HEAT ammunition, which could penetrate 70 mm of armour at 50 m (160 ft). The Germans had 93 Panzer IIIs and 73 Panzer III (specials) with long-barrelled 50 mm (2.0 in) guns (Pz.Kpfw III Ausf.L) and 10 Panzer IV and 27 Panzer IV (specials) with long 75 mm guns (Pz.Kpfw IV Ausf.F2).[27] The British had 700 tanks at the front, of which 160 were Grants. Only 500 of the British tanks were engaged in the armoured battle, which was brief.[28]

As the Panzer divisions approached the ridge, the Panzer IV F2 tanks opened fire at long range and destroyed several British tanks. The British Grants were handicapped by their hull-mounted guns that prevented them from firing from hull-down positions. When the Germans came into range, they were exposed to the fire of the brigade and their tanks were hard hit. An attempt to outflank the British was thwarted by anti-tank guns and with night beginning to fall and fuel running short because of the delays and heavy consumption over the bad 'going', General Gustav von Vaerst, the Afrika Korps commander, ordered the Panzers to pull back. During this engagement, the Germans lost 22 tanks and the British 21.[29] In the central sector, the 25th Infantry Division "Bologna" and German Infantry Regiment 433 attacked several Indian, South African and New Zealand units on Ruweisat Ridge and managed to capture Point 211 but were later driven off by a counter-attack.[30][lower-alpha 2]
1–2 September[edit | edit source]
The night of 31 August/1 September brought no respite for the Axis forces, as the Albacore and Wellington bomber combinations returned to the attack, concentrating on the Axis supply lines. This added to Rommel's supply difficulties as Allied action had sunk over 50 per cent of the 5,000 long tons (5,100 t) of petrol promised to him by Mussolini.[33] On 1 September the 21st Panzer Division was inactive (probably because of a lack of fuel) and operations were limited to an attack by the 15th Panzer Division toward the eastern flank of the 22nd Armoured Brigade.[23] The attack started at dawn but was quickly stopped by a flank attack from the 8th Armoured Brigade. The Germans suffered little, as the British were under orders to spare their tanks for the coming offensive but they could make no headway either and were severely shelled.[34] The 132nd Armoured Division "Ariete" and 133rd Armoured Division "Littorio" had moved up on the left of the Afrika Korps and the 90th Light Division and elements of Italian X Corps had drawn up to face the southern flank of the New Zealand box.[23] Air raids continued throughout the day and night and on the morning of 2 September, realising his offensive had failed and that staying in the salient would only add to his losses, Rommel decided to withdraw.[35]
Axis withdrawal[edit | edit source]

In a message to Oberkommando der Wehrmacht (OKW armed forces high command) Rommel justified his decision to abandon the offensive by the lack of fuel, Allied air superiority and the loss of surprise.[36] On 2 September, Armoured cars of the 4/8th Hussars (4th Armoured Brigade) attacked 300 Axis supply lorries near Himeimat, destroying 57 and Italian armoured units had to be moved to protect Axis supply lines. In the air the DAF flew 167 bomber and 501 fighter sorties.[35] Montgomery realised that the Afrika Korps was about to withdraw and planned attacks by the 7th Armoured Division and the 2nd New Zealand Division (Lieutenant-General Bernard Freyberg) under the proviso that they were to avoid excessive losses. The 7th Armoured Division managed harassment raids but the New Zealand Division attacked with the experienced 5th New Zealand Brigade, the new 132nd Infantry Brigade (Brigadier C. B. Robertson) of the 44th (Home Counties) Division under command and tank support from the 46th Royal Tank regiment (46th RTR, 23rd Army Tank Brigade).[37]
Operation Beresford[edit | edit source]

Operation Beresford began at 22:30 on 3 September. The 5th New Zealand Brigade on the left inflicted many casualties on the Italian defenders and defeated Axis counter-attacks the next morning.[37] The Axis defenders were alerted by diversionary raids by the 6th New Zealand Brigade (Brigadier George Clifton) on the right flank of the 132nd Infantry Brigade which was an hour late arriving on their start line. The attack was a costly failure; the Valentine tanks of the 46th RTR got lost in the dark and ran onto a minefield where twelve were knocked out. The 90th Light Division inflicted 697 casualties on the 132nd Infantry Brigade and 275 casualties on the New Zealanders.[38] Robertson was wounded and Clifton was captured by a patrol of the X Battalion of the Italian 185th Infantry Division "Folgore". The vigorous Axis defence suggested to Freyberg that another attack was unlikely to succeed and advised that the troops should be withdrawn from their very exposed positions and the operation called off. Montgomery and Horrocks agreed and the troops were withdrawn on the night of 4 September.[39]
5 September[edit | edit source]
The position north of the New Zealand Division was held by 5th Indian Infantry Division, relieved by the 4th Indian Infantry Division on 9 September. After this failure against the Folgore Division, the Afrika Korps retired unhindered, except for attacks by the DAF, which flew 957 sorties in 24 hours.[40] By 5 September, the Axis units were back almost on their starting positions and the battle was over.[41]
Aftermath[edit | edit source]
Analysis[edit | edit source]

The battle was the last big offensive undertaken by the Axis in North Africa and the superior firepower of the Allies and their air supremacy brought them victory.[1] There has been criticism of Montgomery's leadership during the battle, especially his decision to avoid losses, which prevented the British tank formations from trying to finish off the Afrika Korps when it was strung out between the minefields and Alam Halfa.[42] Friedrich von Mellenthin in Panzer Battles painted a dramatic picture of Panzer divisions, paralysed by lack of fuel, under constant bombardment and awaiting a British onslaught.[43]
Montgomery pointed out that the Eighth Army was in a process of reformation with the arrival of new, untrained units and was not ready to take the offensive. Nor was his army yet prepared for a 1,600 mi (2,600 km) pursuit were they to break through, which had caused both sides to fail to end the desert campaign, after gaining tactical success. Montgomery did not want his tanks wasted on futile attacks against Rommel's anti-tank screen, something that had frequently happened in the past, handing the initiative to the Axis forces. Rommel complained to Kesselring, "The swine isn't attacking!"[44] Montgomery kept his forces intact and the Eighth Army accumulated supplies for the offensive in October that came to be known as the Second Battle of El Alamein.[45]
Casualties[edit | edit source]
During the Battle of Alam el Halfa, the Allies suffered 1,750 casualties, compared to 2,930 for the Axis. The Allies lost more tanks than the Axis but for the first time in this campaign there was no great disproportion in tank losses. Constant harassment by the RAF cost the Panzerarmee Afrika many transport vehicles.[1]
See also[edit | edit source]
- List of British military equipment of World War II
- List of German military equipment of World War II
- List of Italian Army equipment in World War II
- North African campaign timeline
- List of World War II Battles
Notes[edit | edit source]
- ↑ "Only a few days before the battle, Ultra confirmed that Montgomery's estimate of Rommel's intentions was correct."[17]
- ↑ The Official History of New Zealand in the Second World War 1939–45 refers to the Italo-German infantry action as 'feints'.[31] Captain Cyril Falls, a British military historian, wrote that it was a strong counter-attack requiring an equal response."In the centre of the British front a good Italian division, the Bologna, delivered a strong attack on the Ruweisat Ridge, and a considerable counter-attack was required to expel it from the footing it gained."[32]
Citations[edit | edit source]
- ↑ 1.0 1.1 1.2 1.3 Watson 2007, p. 14.
- ↑ Buffetaut 1995, pp. 90–91.
- ↑ Playfair 2004, p. 379.
- ↑ 4.0 4.1 Hinsley 1981, pp. 418–419.
- ↑ Playfair 2004, pp. 338, 379, 392.
- ↑ Hinsley 1981, p. 412.
- ↑ Playfair 2004, p. 392.
- ↑ Hinsley 1981, pp. 410–411.
- ↑ Carver 2000, p. 48.
- ↑ Fraser 1993, p. 351.
- ↑ Playfair 2004, p. 382.
- ↑ Watson 2007, p. 12.
- ↑ 13.0 13.1 Fraser 1993, pp. 355–357.
- ↑ Carver 2000, p. 49.
- ↑ Stumpf 2001, p. 755.
- ↑ Harper 2017, p. 93.
- ↑ 17.0 17.1 Smith 2002, pp. 74–77.
- ↑ Watson 2007, p. 10.
- ↑ 19.0 19.1 Playfair 2004, p. 384.
- ↑ Fraser 1993, p. 354.
- ↑ Fraser 1993, pp. 354–355.
- ↑ Walker 1967, p. 45.
- ↑ 23.0 23.1 23.2 Playfair 2004, p. 387.
- ↑ Watson 2007, p. 13.
- ↑ 25.0 25.1 Playfair 2004, p. 386.
- ↑ Carver 2000, p. 58.
- ↑ Playfair 2004, p. 383.
- ↑ Liddell Hart 1973, pp. 293–295.
- ↑ Carver 2000, p. 62.
- ↑ Playfair 2004, pp. 385–386.
- ↑ Murphy 1966, p. 358.
- ↑ Falls 1948, p. 262.
- ↑ Lightbody 2004, p. 142.
- ↑ Fraser 1993, p. 359.
- ↑ 35.0 35.1 Carver 2000, p. 67.
- ↑ Playfair 2004, p. 388.
- ↑ 37.0 37.1 Barr 2005, pp. 245–246.
- ↑ Carver 2000, p. 70.
- ↑ Playfair 2004, p. 389.
- ↑ Buffetaut 1995, p. 90.
- ↑ Liddell Hart 1973, p. 295.
- ↑ Carver 2000, p. 181.
- ↑ Mellenthin 1956, p. 103.
- ↑ Walker 1967, p. 180.
- ↑ Fraser 1993, p. 360.
References[edit | edit source]
- Barr, N. (2005). Pendulum of War: The Three Battles of Alamein. Woodstock: Overlook Press. ISBN 1-58567-655-1.
- Boog, H.; Rahn, R.; Stumpf, R.; Wegner, B. (2001). "(Part V) The War in the Mediterranean Area 1942–1943: Operations in North Africa and the Central Mediterranean. 2. The Battle of Alam Halfa (30 August–6 September 1942)". In Osers, E. (ed.). The Global War: Widening of the Conflict into a World War and the Shift of the Initiative 1941–1943 (Edited by the Militărgeschichtliches Forschungsamt [Research Institute for Military History] Potsdam, Germany). Germany and the Second World War. Vol. VI. Translated by Osers, E.; Brownjohn, J.; Crampton, P.; Willmot, L. Oxford: Clarendon Press. pp. 748–764. ISBN 0-19-822888-0.
- Buffetaut, Yves (1995). Operation Supercharge-La seconde bataille d'El Alamein [Operation Supercharge: The Second Battle of El Alamein]. Les grandes batailles de la Seconde Guerre mondiale, Collection hors-série Militaria (in français). Paris: Histoire Et Collections. OCLC 464158829.
- Carver, Michael (2000) [1962]. El Alamein. Stansted: Wordsworth Editions. ISBN 1-84022-220-4.
- Fraser, David (1993). Knight's Cross: A Life of Field Marshal Erwin Rommel. London: Harper Collins. ISBN 0-00-638384-X.
- Falls, Cyril (1948). "Aftermath of War: The Eights Army from Alamein to Sangro". The Illustrated London News. 212 (5672–5684). The Illustrated London News & Sketch. ISSN 0019-2422.
- Harper, Glyn (2017). The battle for North Africa: El Alamein and the turning point for World War II. Bloomington, Indiana: Indiana University Press. ISBN 978-0-253-03143-3.
- Hinsley, F. H.; Thomas, E. E.; Ransom, C. F. G.; Knight, R. C. (1981). British Intelligence in the Second World War. Its influence on Strategy and Operations. Vol. II. London: HMSO. ISBN 0-11-630934-2.
- Liddell Hart, Basil (1973) [1970]. Liddell Hart's History of the Second World War (repr. Book Club Associates ed.). Cassell. ISBN 978-0-33-358262-6.
- Lightbody, Bradley (2004). The Second World War: Ambitions to Nemesis. London: Routledge. ISBN 0-415-22404-7.
- Mellenthin, Friedrich Wilhem von (1956). Panzer Battles: A Study of the Employment of Armour in the Second World War. Translated by Turner, L. C. F. New York: Ballantine. OCLC 638823584.
- Murphy, W. E. (1966) [1966]. 2nd New Zealand Divisional Artillery. Official History of New Zealand in the Second World War 1939–1945. Wellington: War History Branch. OCLC 226971027.
- Playfair, Ian; with Flynn, F. C.; Molony, C. J. C. & Gleave, T. P. (2004) [1960]. Butler, J. R. M. (ed.). The Mediterranean and Middle East: British Fortunes reach their Lowest Ebb (September 1941 to September 1942). History of the Second World War United Kingdom Military Series. Vol. III (facs. repr. Naval & Military Press, Uckfield ed.). HMSO. ISBN 1-84574-067-X.
- Smith, Kevin D. (2002). "Coming into its Own: The contribution of Intelligence at the Battle of Alam Halfa" (PDF). Military Review: 74–77. ISSN 0026-4148. Archived (PDF) from the original on 2025-02-02. Retrieved 2025-08-09.
- Walker, Ronald (1967). "Chapter 11, Summary of the Battle". Alam Halfa and Alamein. The Official History of New Zealand in the Second World War 1939–1945. New Zealand Historical Publications Branch, Wellington. pp. 165–181. OCLC 893102.
- Watson, Bruce Allen (2007) [1999]. Exit Rommel. Mechanicsburg PA: Stackpole. ISBN 978-0-8117-3381-6.
Further reading[edit | edit source]
- Beretta, Davide (1997). Batterie semoventi, alzo zero: quelli di El Alamein [Self-propelled Batteries, Point Blank of El Alamein]. Milano: Mursia. ISBN 88-425-2179-5.
- Cappellano, Filippo (2012). Italian Medium Tanks: 1939–45. Oxford: Osprey. ISBN 978-1-84908-775-9.
- Conetta, Carl; Knight, Charles; Unterseher, Lutz (September 1997). "Defensive Military Structures in Action: Historical Examples". Confidence-Building Defense: A Comprehensive Approach to Security & Stability in the New Era, Study Group on Alternative Security Policy and Project on Defense Alternatives. 1994. Cambridge, Massachusetts: Commonwealth Institute. OCLC 45377322. Archived from the original on 2008-03-11. Retrieved 2007-01-11.
- Cox, Sebastian; Gray, Peter (2002). Air Power History: Turning Points from Kitty Hawk to Kosovo. London: Frank Cass. ISBN 0-7146-8257-8.
- Montanari, Mario (2007). The Three Battles of El Alamein (June–November 1942 Parte Prima. Translated by Doré, Dominique (online scan abbr. trans, Le operazioni in Africa Settentrionale vol III ed.). Roma: L'Ufficio Storico dello Stato Maggiore dell'Esercito. ISBN 978-88-87940-79-4. Retrieved 11 December 2019 – via issuu.
- Naveh, Shimon (1997) [1991]. In Pursuit of Military Excellence; The Evolution of Operational Theory. London: Frank Cass. ISBN 0-7146-4727-6.
- Roberts, Major-General G. P. B.; Bayerlein, Generalleutnant Fritz. Basil Liddell Hart (ed.). "U.S. Combat Studies Institute Battle Report: Alam Halfa". Archived from the original on 21 October 2007. Retrieved 5 November 2007.
External links[edit | edit source]
- Pages using the JsonConfig extension
- Conflicts in 1942
- 1942 in Egypt
- North African campaign
- Western Desert campaign
- Egypt in World War II
- Battles of World War II involving New Zealand
- Battles of World War II involving the United Kingdom
- Battles of World War II involving Italy
- Battles of World War II involving Germany
- Tank battles of World War II
- Tank battles involving Germany
- Tank battles involving the United Kingdom
- August 1942 in Africa
- September 1942 in Africa